


15 Questions to Ask a B2B Paid Media Agency Before You Sign
Let’s face it, Google Tag Manager can be a beast. But it’s also an empowering tool for advertisers, especially when you’re able to accomplish feats without the assistance of a developer.
In this post, we’ll cover the three most common (and simplest) ways to track form submissions with Google Tag Manager, specifically:
Note: this blog will cover the how-to when it comes to creating triggers and will assume you already know how to build the tag for your circumstances - here’s a guide to LinkedIn tracking if you don’t have that set up. If you need a more comprehensive start-to-finish guide, check out this post from Analytics Mania.

Which Method Should You Use?
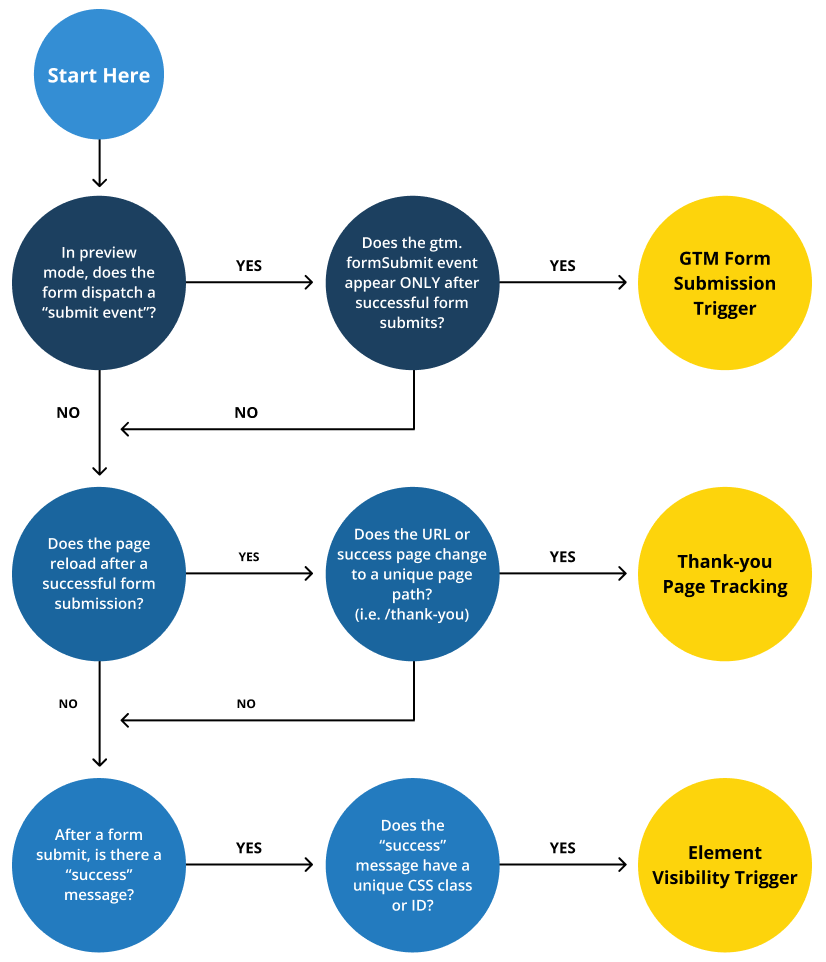
To answer that question, we want to send you on a mini choose-your-own-adventure by outlining your options and the scenarios for ideal usage. Then we’ll dive into an explanation of each option.
Keep in mind, there are more ways to track form submissions than the ones we mentioned, but we’ll stick to the top three most common ways for ease-of-use purposes. If you run into roadblocks (which is common), you may need to do additional research or even think outside the box based on your situation. If you’re still unsure which method to use, just begin with Form Submission Trigger and use trial and error to test out each method.
Most scenarios, however, will follow one of the options in the chart below (again, inspired by Analytics Mania):
Based on where you landed on the infographic, skip to the section that best applies to you!
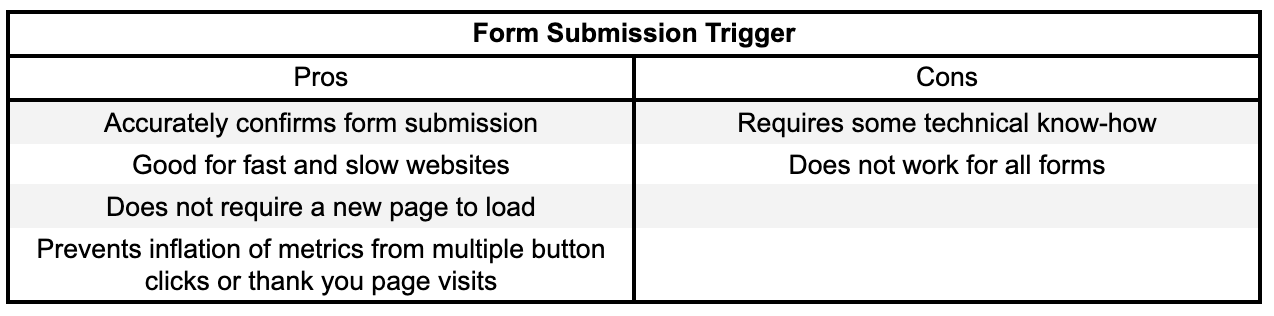
GTM Form Submission Trigger
This is the first way to attempt tracking a form submission. Keep in mind, if a “Form Submit” event does not occur within the Preview Mode console after submitting a form, this method of tracking will not be possible without the help of a developer pushing an event to the data layer.
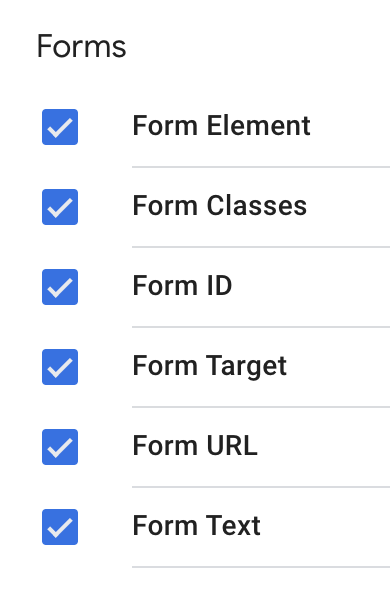
You’ll want to begin by ensuring that all proper variables are activated. Go to the “Variables” tab and click “configure” in the top right corner. Make sure all “form” related built-in variables are checked.
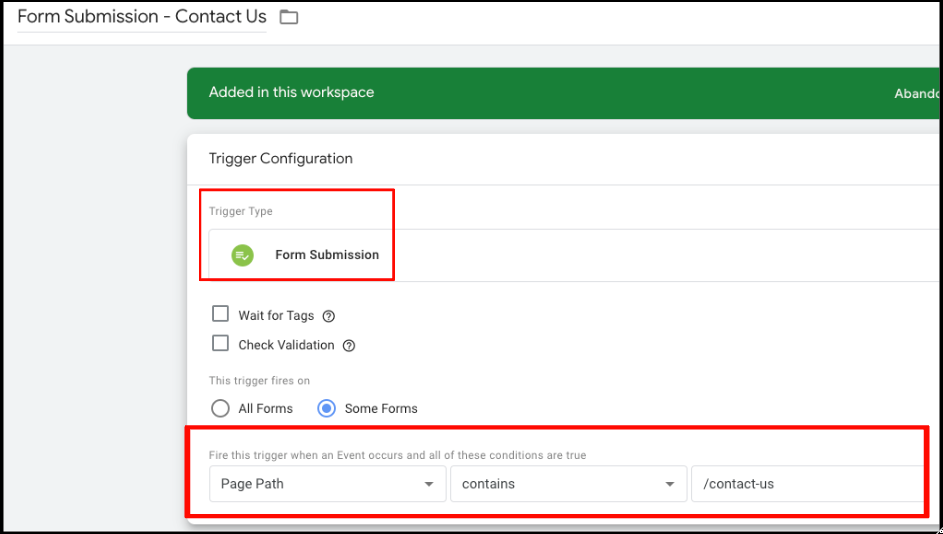
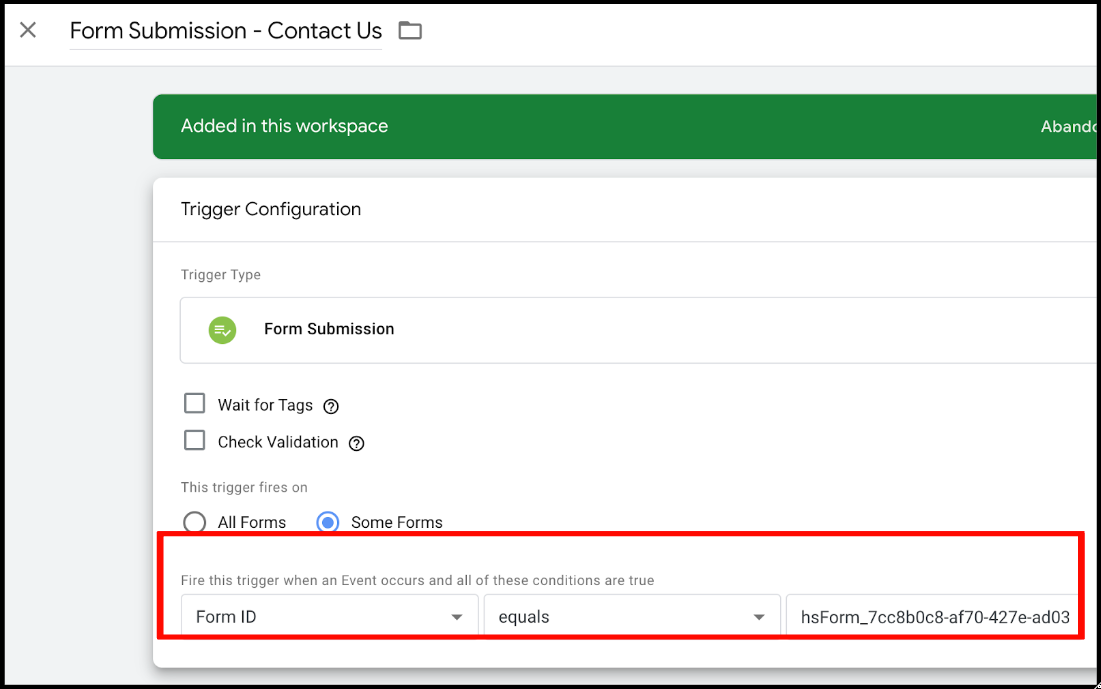
Next, create a “Form Submission” trigger with similar settings reflected in the following image. The idea is to only track the form you’re interested in tracking, so if your form has a unique URL parameter, use it within the “Page Path” descriptor. Make sure to save your trigger settings and name appropriately.
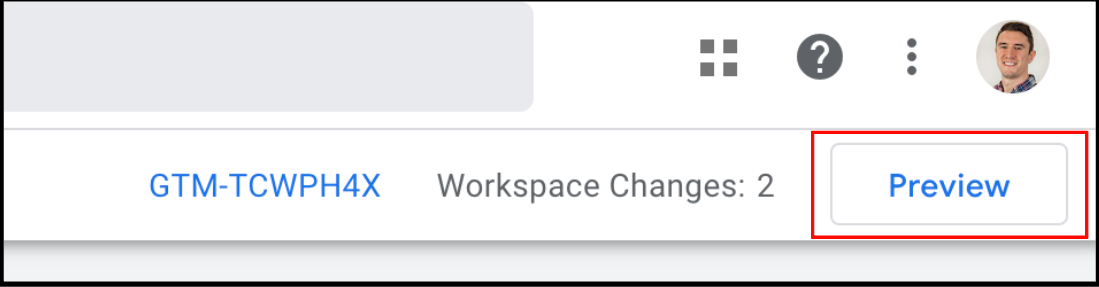
Make your way to the “Preview” mode.
Enter the website URL where the form in question is located:
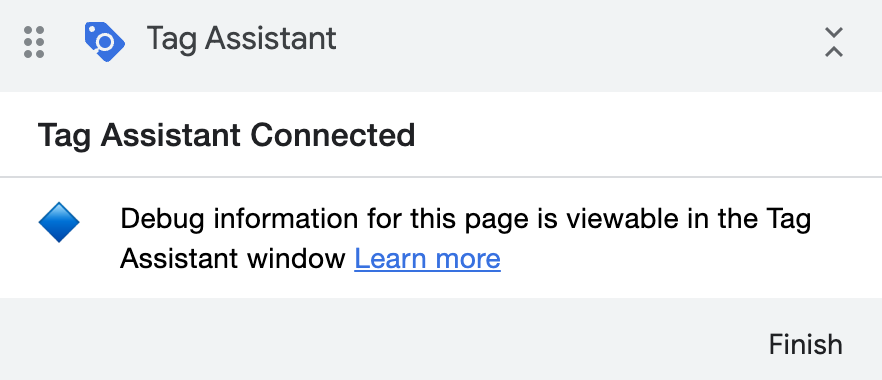
The following image should populate at the bottom right corner of your screen:
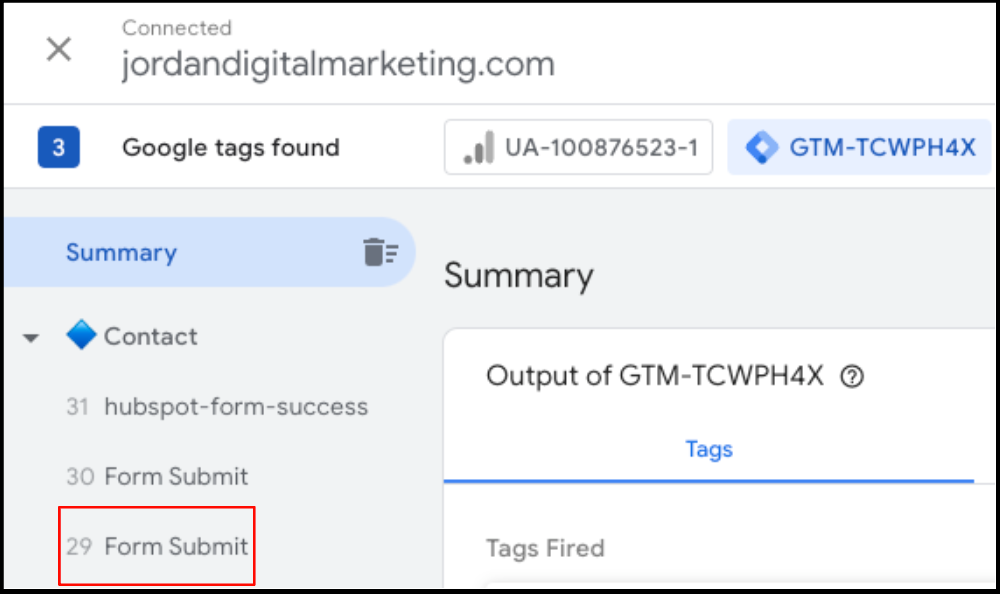
Submit a test form and check the console on the left side; you’re looking to see whether a “Form Submit” event populates.
Click on Form Submit. Within the “Variables” tab, look through the form’s variables to find one that is unique to the form. Typically, this will be the Form ID. If not, Form Classes can work, but Form ID is better.
Go back to the trigger you created and update it to include the Form ID you just identified. Save the trigger again.
Almost done!
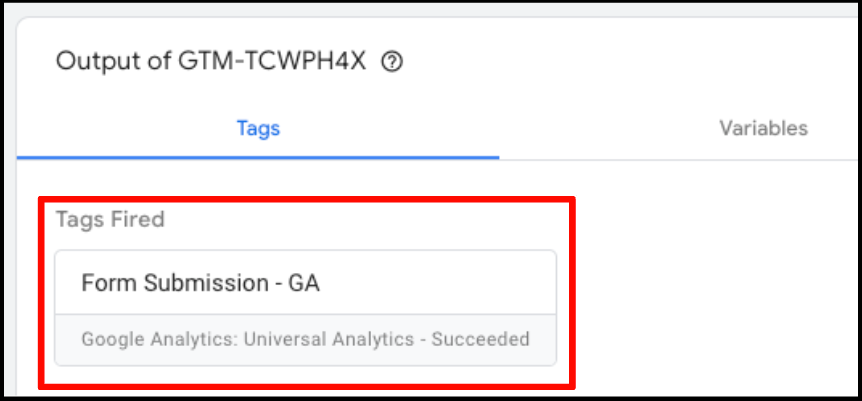
Make sure your trigger is tied to a tag (i.e. Google Analytics, Google, Linkedin, etc.). Go back to Preview mode and submit another test form. The event “Form Submit” should pop up in your console, and the tag you created should be under “Fired”. You can determine if your tag has fired by clicking on the “form submit” event in your console and checking under the “Tags Fired” section to confirm it works.
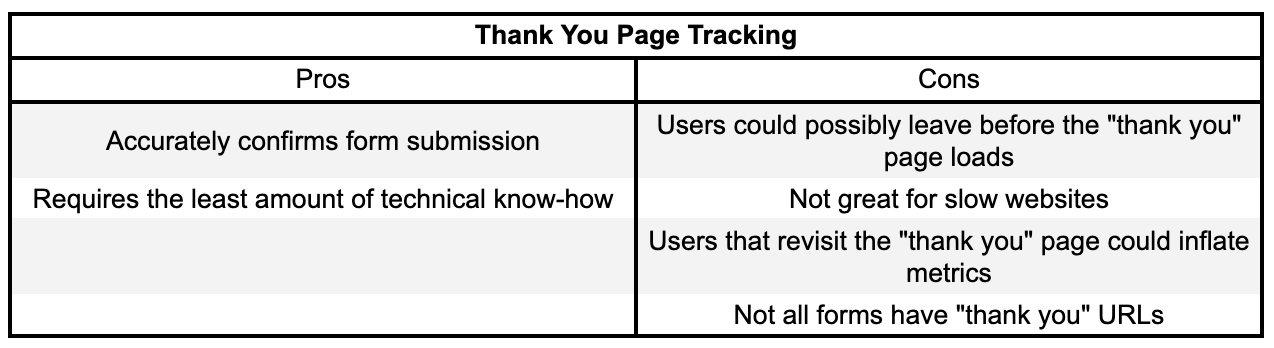
“Thank-You” Page Tracking
This is probably the simplest way of tracking a form submission and can be used if a new window loads, after submitting a form, with a unique string within the page URL (ex: /confirmation).
First, submit the form to see if there’s a unique “thank-you” or “success” or “confirmation” within the page URL after submission.
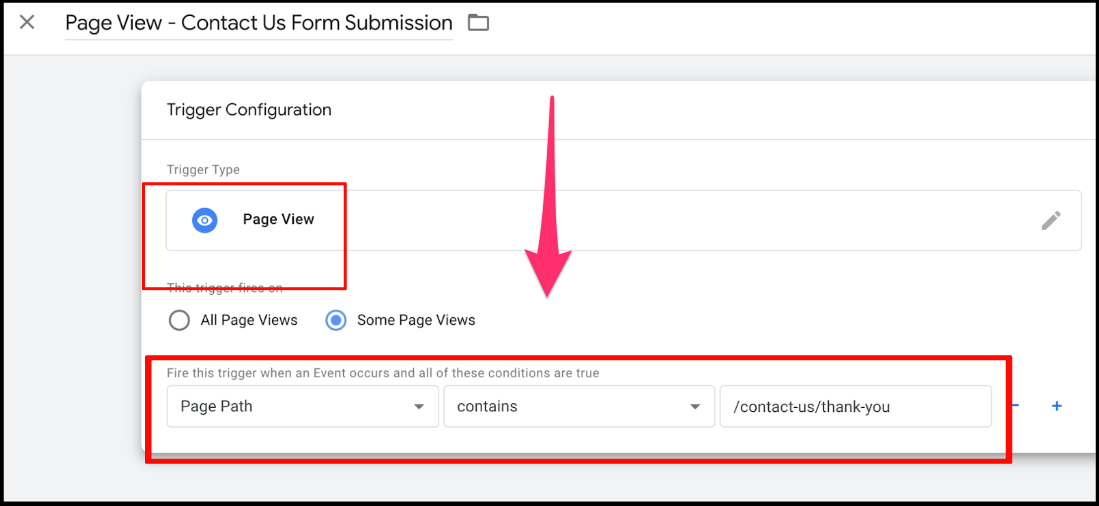
Create a “Page View” trigger and mirror the settings in the image, but with your unique URL parameters from the thank-you page. Save the trigger.
Add the trigger to your tag and test the form submission in preview mode to see if your tag fires.
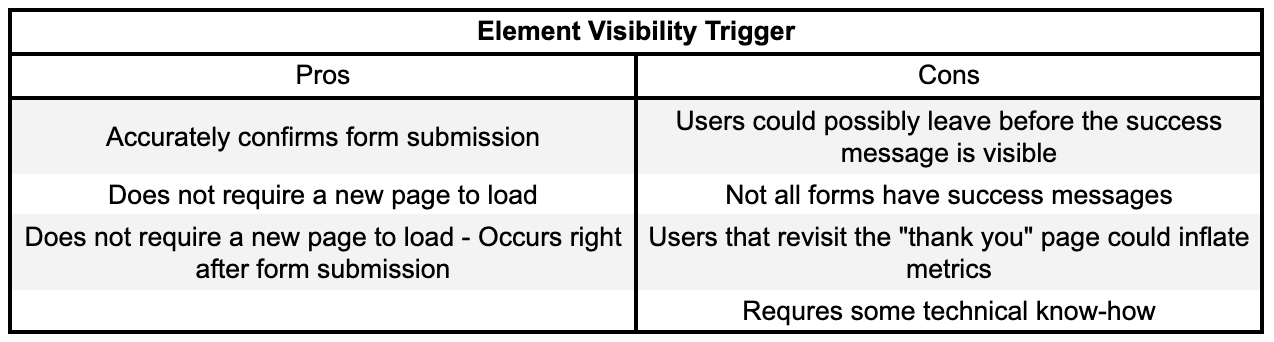
Element Visibility Trigger
Element visibility can be useful when there is some type of “thank you” message on a confirmation screen after a form submission. Other types of elements can be used as well, but the “thank-you” pop-up is one of the most common use cases for element visibility triggers with form submissions.
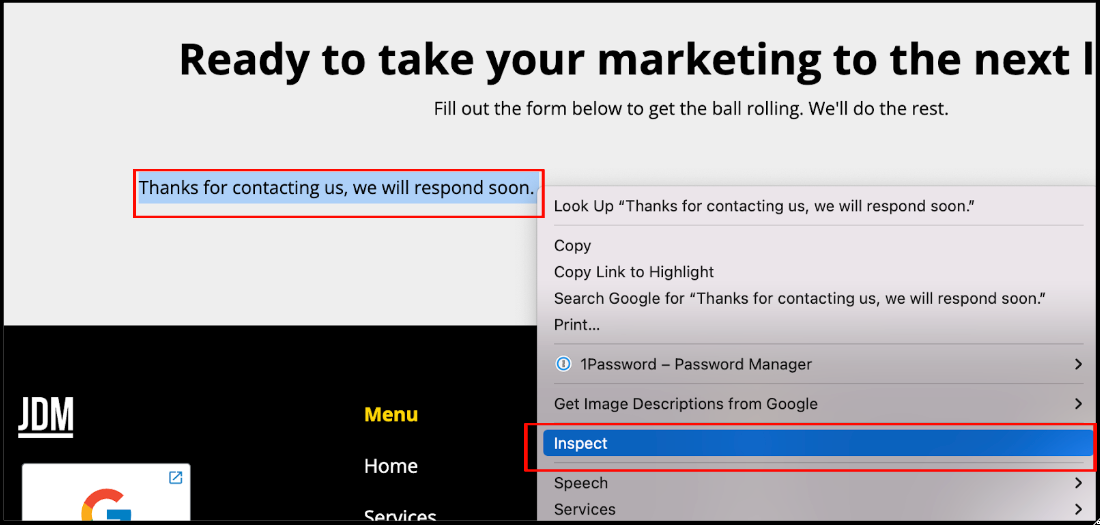
To start, submit a form and identify the success message you would like to track. Right-click the message text and select “inspect”.
From here, you’ll see highlighted text under the Elements tab. Look for an “ID” or a “Class”. You can double-click the ID or Class and copy it within the Elements console. In this case, we are working with a “class”.
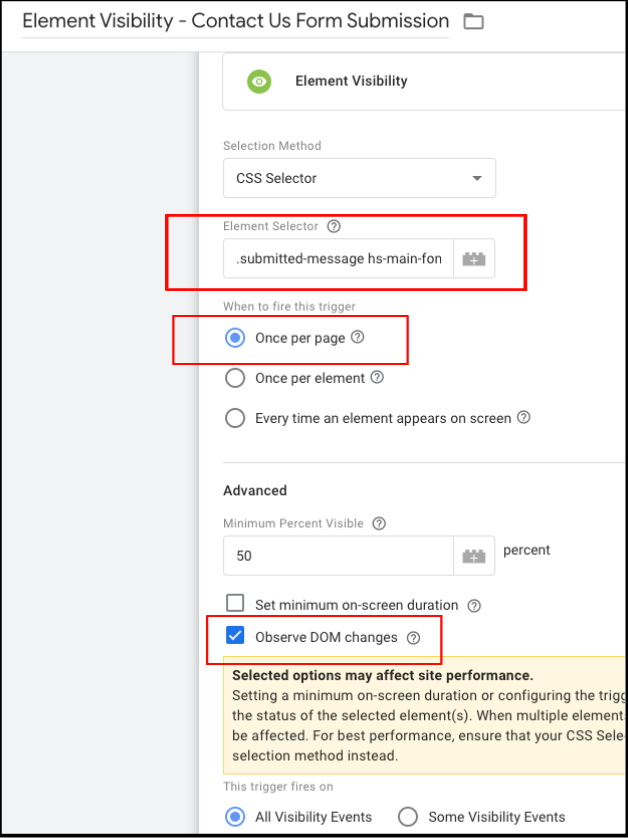
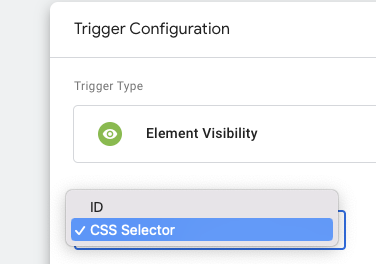
Create an Element Visibility trigger. Under “selection method”, you will need to decide between ID and CSS Selector. ID is preferred and is used when you want to track the thank-you message ID. In this case, we only have a “class” (when using “class,” you will want to change the selection method to “CSS Selector”).
Enter the “class” that you copied into the “Element Selector” section. Make sure to include a period at the beginning, or this won’t work.
You will also want to check the box “Observe DOM Changes”; this allows the trigger to fire even if the element appears without the user scrolling over it (below the fold).
Make sure the bubble next to “once per page” is checked. This is to prevent conversions from being attributed more than once.
You can create additional conditions for the trigger to fire by checking the bubble “some visibility events” instead of “all visibility events”.
Next, add the element visibility trigger to your tag and test in preview mode.
Wrap-up
Congrats! You’ve learned three common and fairly simple ways to track form submissions in Google Tag Manager.
If your tag fired successfully on your first try, that’s great! It won’t always be straightforward and definitely won’t always be a walk in the park. Sometimes, you may need to think outside the box.
The good news: GTM is a powerful tool and if there’s one thing I’ve learned while using it, there’s usually a solution out there for every scenario. You just may need to get good at exploring.
Reach out to Jordan Digital Marketing if you'd like to connect with an expert for your tracking needs!